Making RNLIVE, a live reaction streamer overlay was fun and easy. The secret? A new(er) multiplayer platform by Sunil and friends called PartyKit. Let’s look into what I made, how I made it, and some thoughts about where to go from here.
Inspiration
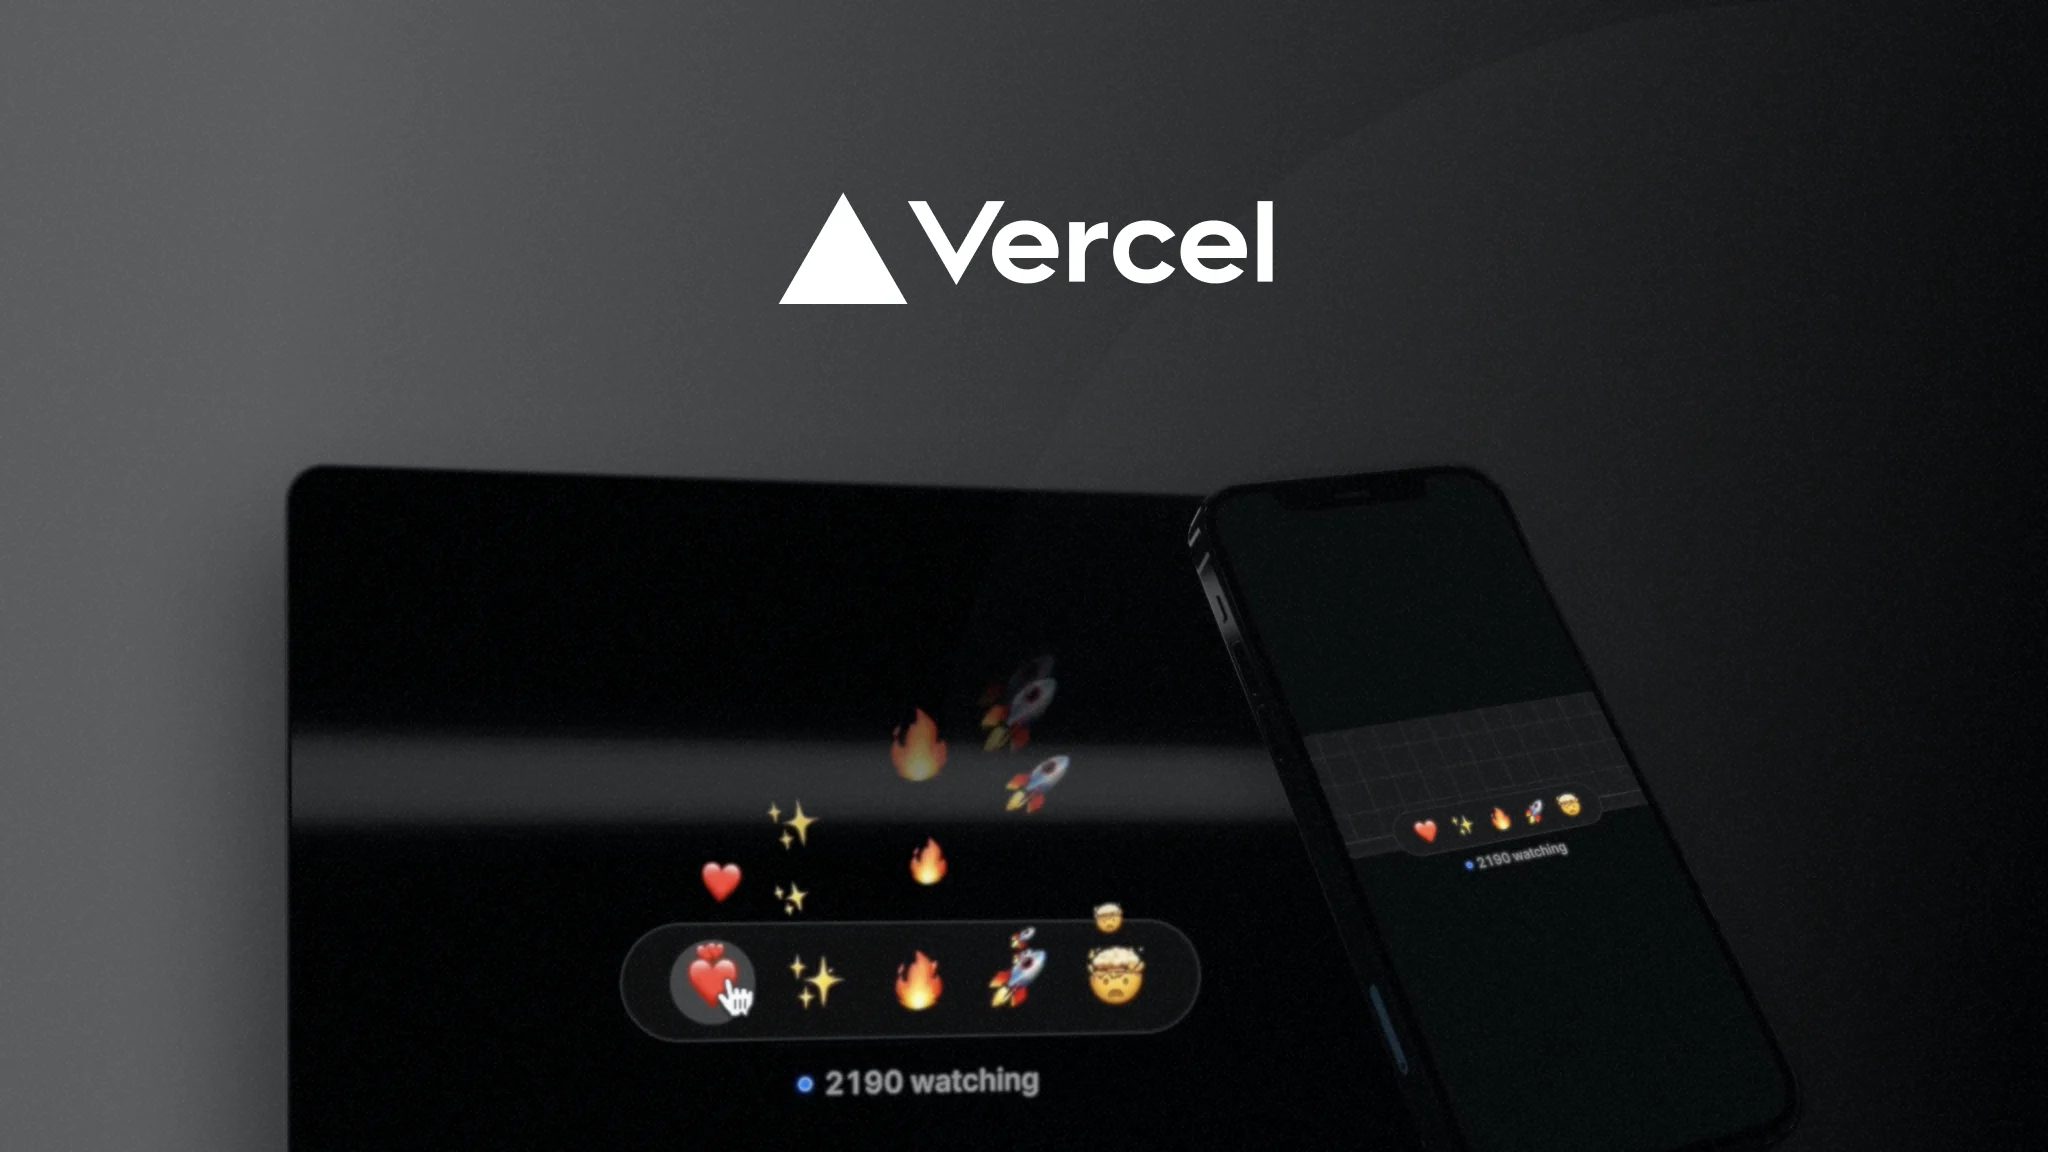
Vercel Ship’s livestream emoji reaction experience, powered by Liveblocks (source)
RNLIVE (rnlive.club) was made as a combination of two wants: making my livestream more fun with those emotes coming onto the screen I’ve seen other streamers have; and seeing if I can recreate Vercel Ship’s live audience interactions built with Liveblocks’ platform.
Now I’ve used Liveblocks before, so for this project I wanted to use PartyKit since I’ve been following its creator, Sunil, since he announced he was working on it earlier this year and it’s fun to learn new technology. Also shoutout to Jason Lengstorf on making basically the same thing in Astro first.
What is it?
Before we get into PartyKit and the code implementing it, we should take a step back and see what this project does. A streamer logs in with their Twitch account, and add emotes with a name and link to the image or gif source. Opening the overlay creates a new browser window that they can add as an OBS source for their stream. Viewers can then go to the site for their favorite streamer to press buttons corresponding to emotes which will show on the overlay, and therefore the stream.
The Plan
Pretty straightforward as a product, so the main obstacle in making it is learning the technology behind it, particularly WebSockets and PartyKit’s implementation of it. As a flow chart, we can imagine it step by step connecting where our message goes between our clients and our server.

In this example we have one viewer and one streamer. The viewer sends a message to our server using a WebSocket, which sends it back client side for the streamer. To see this in action, let’s look at RNLIVE’s source code.
I’m not going to go over authentication, databases, and other website stuff. The entire codebase should be annotated with comments so if you want to know more, definitely check the Github repository linked here.
But for now all we need to focus our attention to are three files: the partykit.ts file that will be deployed as our server, the viewer page with our buttons, and the overlay page that will take those inputs.
Code Review
First the viewer page. To connect and send stuff to our PartyKit server, we have to create a PartySocket object that has our server’s host URL and a room ID to join (which is important to make sure we’re only sending emotes to the correct streamer, indicated by using the streamer’s ID). We can then connect a button to run socket.send() with the name of the button’s emote as a stringified JSON object.
const socket = new PartySocket({
    // 'localhost:1999' is the host URL to connect to when running 'npx partykit dev'
    // '<party-name>.<username>.partykit.dev/party/:id' will be live to connect to after running 'npx partykit deploy'
    host: dev ? "localhost:1999" : `https://rnlive-club.zeucapua.partykit.dev/party/${user_info.id}`,
    room: user_info.id
  });

  function sendToPartyServer(message : string) {
    if (socket) {
      const ping = JSON.stringify({
        type: "ping",
        content: message
      });

      // server can listen to this via 'onMessage' function
      socket.send(ping);
    }
  }
Once that is sent, we can have our PartyKit server listen to it. We create this server with it’s own Typescript file that exports a class that implements the PartyServer interface. (Shoutout to @jevakallio for the class refactor. It made the DX jump ten fold).
This code must be deployed as a server using the PartyKit CLI, either locally (
npx partykit dev) or live production (npx partykit deploy). Since this is nested inside a few folder, you will need to be explicit with the file path when deploying. To learn more, go to PartyKit’s docs.
import type {
  Party,
  PartyServer,
  PartyWorker
} from "partykit/server";

export default class RnLiveParty implements PartyServer {
  // can access to Party's state within this class using 'this.party'
  constructor(public party : Party) {}

  // runs when a connection SENDS a message using 'socket.send(message)'
  onMessage(message : string) {

    // from /[username] (aka viewer): { type: 'ping', content: 'emoteName' }
    const message_data = JSON.parse(message);
    switch (message_data.type) {
      case "ping": {

        // create a response to send to /overlay
        const response = JSON.stringify({
          type: "pong",
          content: message_data.content
        });

        // 'this.party.broadcast' sends a message from server to client
        // can be caught on client with 'socket.addEventListener('message', (event) => {})'
        this.party.broadcast(response);
        break;
      }

      default: {
        console.log({ message_data });
        break;
      }
    }
  }
}

RnLiveParty satisfies PartyWorker;
Inside is a party property that we can call to get information and methods to use the WebSocket. To listen to the message sent by our viewer, we can implement the onMessage function and check the message parameter for the information. Parsing that, we can pass the emote name back client side using this.party.broadcast(). Since broadcasting sends this information to all connected sockets, we are going to pass an additional “response” type so the client knows what’s happening.
// listen to party's broadcasts (this.party.broadcast) from server
socket.addEventListener("message", (event) => {
  // from server (/lib/server/partykit.ts): { type: 'pong', content: 'emoteName' }
  const message_data = JSON.parse(event.data);

  switch (message_data.type) {
    case "pong": {
      displayEmote(message_data.content);
      break;
    }
    default: {
      console.log("DEFAULT:", event.data);
    }
  }
});

async function displayEmote(name : string) {
  for (const s of sources) {
    if (s.name === name) {
      // create emote with url
      let e = { source: s.source, fading: false };

      // add to list that's rendered below
      emotes = [...emotes, e];

      // wait a tick
      await tick();

      // make fading true to trigger out:transition
      emotes[emotes.indexOf(e)].fading = true;
      break;
    }
  }
}
With that in mind, let’s get this broadcast by going to our overlay page. We’ll do the same thing that we did in the viewer page and create a socket variable to connect to the server. The only difference here is adding an Event Listener. We can parse the data being broadcasted to get the emote name and ultimately display it.
The Future?
The way RNLIVE is set up allows for future expansion. Since it’s only JSON objects being passed around as strings, we can additional “response” types to connect custom animations, donations, and the Twitch API itself for more interactions. The sky is the limit. If there are any features that’d be useful for a streamer or fun for a viewer to do during a stream, please let me know.
Available TODAY!
And with that, a reminder that you can use this tool right now. It is live at rnlive.club and if you are a streamer, all you need is your Twitch account to log in and try it out. Open the overlay screen and add it to your OBS (or equivalent) software with a chroma key for the purple background. You can direct viewers to rnlive.club/<username> (e.g. rnlive.club/zeu_dev) to start having emotes sent by them bounce around your screen.
Shameless Plugs
- If you’d like to clone the source code for this project, there is a commented repository on my Github here.
- This project was made live on my Twitch stream. Code new projects with me weekly on twitch.tv/zeu_dev.
- Any comments or questions can reach me on Twitter. Follow me at twitter.com/zeu_dev.
Thank you for reading and I’ll see you with the next project.